QUICK-START GUIDE
Contents
Setting Up
Modifying the Player
Creating an Enemy
Attacks
Putting Levels Together
The Pause Screen, Ready Messages, Hit Sparks, Score, and More
Where to Go From Here
Documentation
Setting Up
Getting Started
Welcome to Rex Engine, the 2D platformer engine for Unity! The purpose of this guide is to get your game off the ground as quickly as possible.
To start with, create an empty scene.
Then, via the menu, go to:
- Window > Rex Engine > Rex Level Editor
This will open the Rex Level Editor window, which gives us numerous options for editing our current scene. Hit the “Setup Level Scene” button.
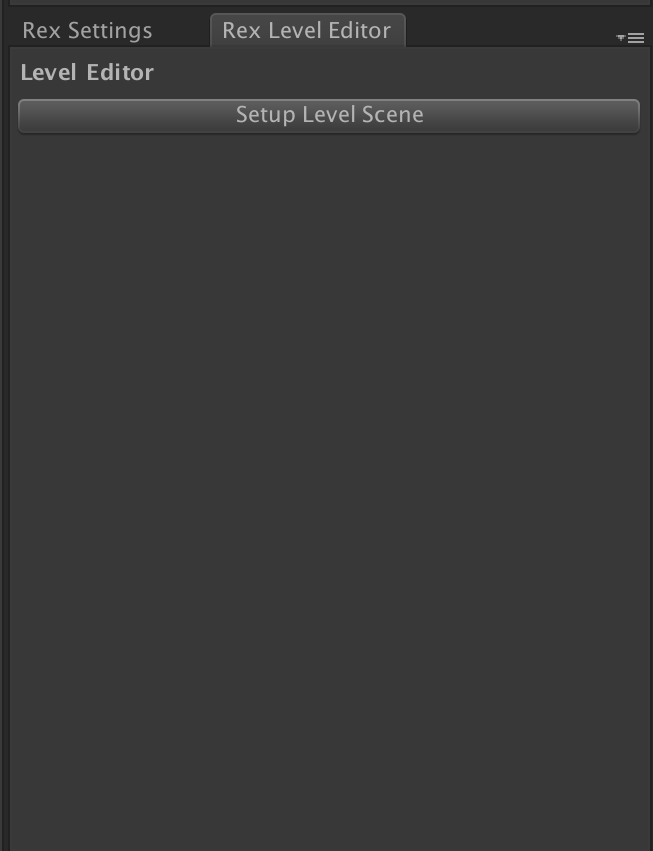
Setup Level Scene automatically adds the GameObjects required for the scene to function. These include the Setup object, which creates the player, cameras, and singletons, as well as some base terrain and SceneBoundaries to constrain the camera and actors inside the room.
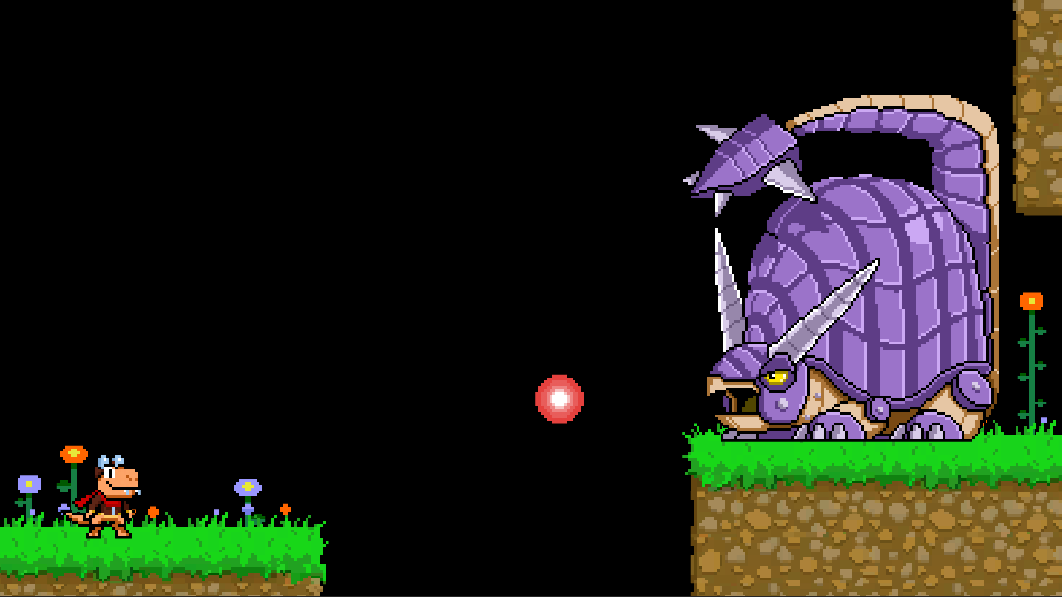
And boom! You’re ready to go. If you hit the Play button, you’ll see that you’re already up and running!
Modifying the Player
Customizing Feel
Now we’re at the really fun part! Here, we get to edit the Player’s movements, or States, all the way from simple things like walking and jumping to more unique things like dashing, climbing, and bouncing from enemies.
Drag an instance of the Player prefab out from:
- Resources > Demo > Actors > Player > Player
This is the Player prefab that gets loaded into the game by default. Expand it and drill down into Player > Controllers > Controller.
In the Inspector, you’ll see RexController, which manages the available States on an actor. You can expand its Animations field and slot various animation clips, which will be played automatically at the appropriate time.
Adding New Mechanics
Below RexController, you’ll see components for various other states, including JumpState and MovingState. Here, there are a variety of fields that let you fine-tune how the actor moves and behaves. Additionally, you’ll see that every State has its own slots for the AnimationClips that play while that state is active. Many states just have one, but more complex states can have more; for example, JumpState allows you to slot unique AnimationClips for the start, body, and crest of the jump.
Let’s try giving the Player an entirely new State! From the menu, go to:
- Tools > Rex Engine > Add Ability
Choose Add Dashing. That’s all it takes! Now, if we hit the Play button, our player will perform a dash move when the dash input is pressed. Like every other RexState, we can slot an animation to play here, or we can use the Inspector to adjust more than a dozen values to give this dash its own sense of feel and timing.
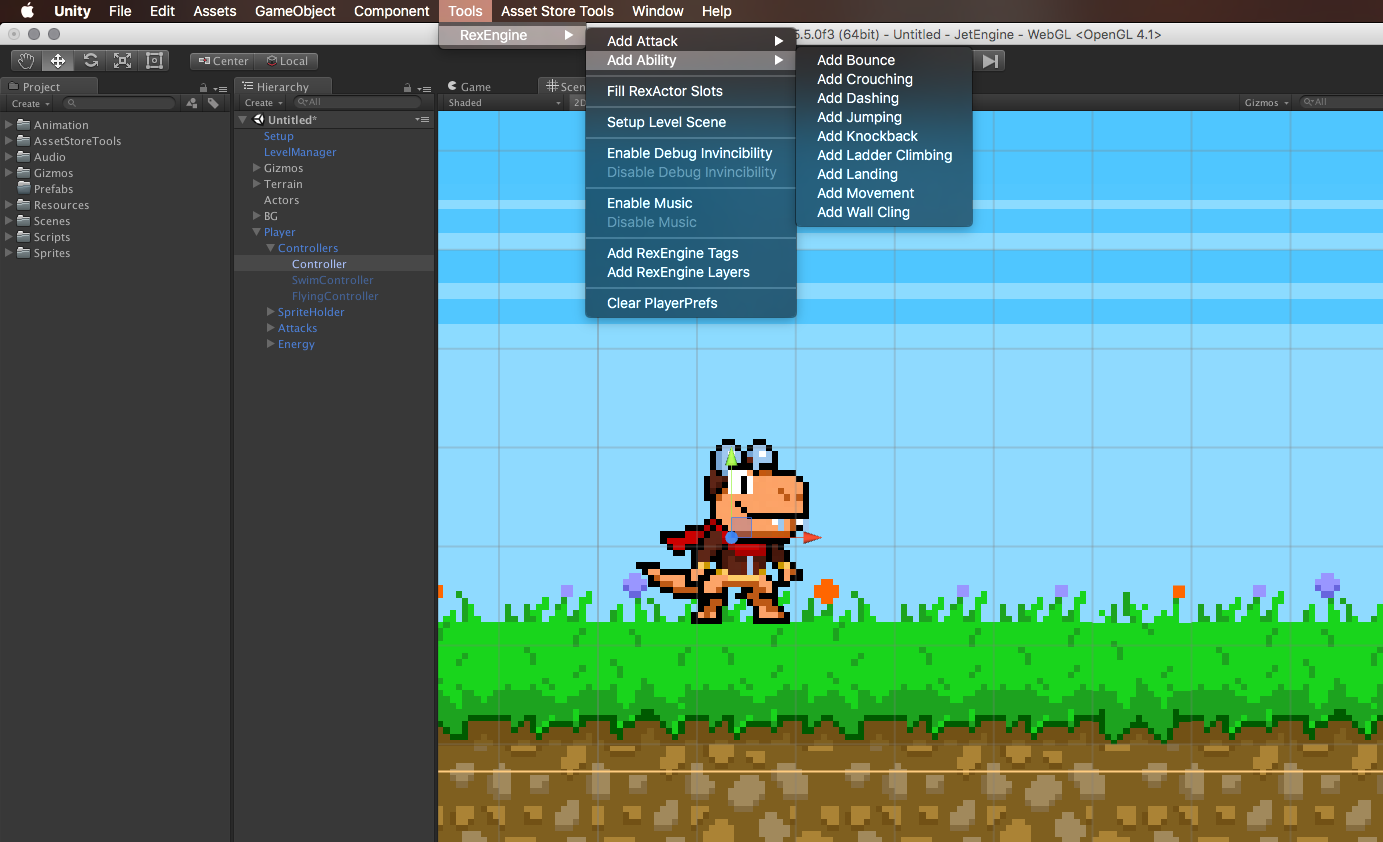
You’ll see other RexStates in the Add Ability menu as well! Want to make the player bounce on enemies? BounceState has you covered. Want to climb up ladders? LadderState is the script for the job. And we’ll be releasing new States periodically, so RexStates are your one-stop shop for an ever-expanding arsenal of classic gaming mechanics.
Loading Different Player Prefabs
If you’d like to change which Player prefab is loaded in, you can access that via the RexSettings panel. You can show this panel by going to:
- Tools > Rex Engine > Rex Engine Settings
The Rex Settings panel has a field at the very top called “Player.” If you expand this, you’ll see a slot called “Player 1 Prefab.” This slot sets the Player prefab that Rex Engine will load in dynamically when you hit the Play button. To use a different Player, all you have to do is drag a new prefab onto this slot from the library. Be sure to hit the Save button at the bottom of the Rex Settings panel afterwards!
Creating an Enemy
Getting the Enemy Onstage
We’ve gotta have some enemies for the player to tackle, right? Fortunately, that’s easy too!
Go to:
- GameObject > Create Rex Engine > Create Blank Enemy
This will give us a prefab with all the tools an Enemy needs, including physics, a Controller, animations, and even some customizable AI.
Most of this should look familiar by now, because all of the base components are the same ones we used for the Player! If you expand the Enemy GameObject, you’ll see that it’s got a Controller, and it has its own RexState components. If you want to add new functionality to the enemy – say, to allow them to jump – it’s as easy as dragging a JumpState component onto that GameObject.
Enemy AI
The last piece of the Enemy puzzle is AI. You’ll see that the enemy has its own AI GameObject, with a component called MovementAI. Here, we can configure a myriad of basic enemy behaviors, including the direction they move in, if they turn when they hit a wall, if they jump when they touch a ledge, and even if they should attack on a timer.
Attacks
Setting Up an Attack
So we just made a new enemy, but what if we want it to be tougher? No worries! Let’s walk through giving it a projectile attack.
Click on the Enemy GameObject, and drill down into Attacks > Projectile. The Attack component here gives us all the capability we need to make the enemy fire bullets periodically.
If you expand this object, you’ll see that it has a child called RexPool. While the Attack component gives us access to the behaviors of the attack – the animation that plays, the cooldown between attacks, and more – the RexPool is where the actual projectile will be housed. In the Inspector, you’ll see a prefab slotted in the Prefab slot of the RexPool component; that prefab will be used as our projectile, and spawned as needed.
Simple Attack AI
Now that our Attack has been created, let’s go to the AI GameObject, and look at the EnemyAI script in the Inspector. The bottom field is called “Attacks.” The top slot here is called “AttackToPerform,” and by dragging the new Attack child object onto this slot, we’ll give the AI access to that attack. The bottom int, “FramesBetweenAttacks,” tells the AI how many frames to wait between attacks; if this value is set to 240, it will fire a projectile every 240 frames.
And that’s it! If we hit Play now, we’ll see that the enemy is firing bullets at us! Nothin’ to it.
Coincidentally, you’ll notice that the Player already has an Attack on it. As with everything else, the Player and Enemies use the same components; the only difference is that the Player is set up to read inputs from a keyboard or a controller, while the Enemy uses its AI class to govern what to do and when.
Putting Levels Together
Level Up
What’s a game with only one level? We need an easy way to put scenes together, and Rex Engine delivers.
First, make sure the Rex Level Editor window is open. Go to:
- Window > Rex Engine > Rex Level Editor
The Rex Level Editor window will give us access to numerous options, including changing the music that plays in the current scene changing the playable dimensions of the scene, and more.
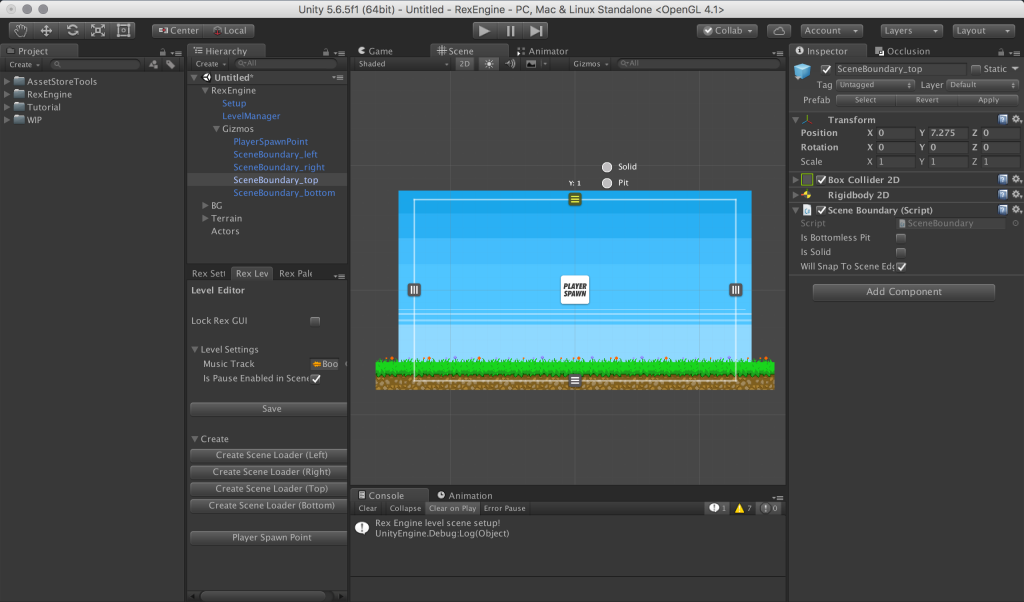
Let’s try making our existing scene a little bigger. The white lines bordering the scene are called SceneBoundaries. In the center of each of these SceneBoundaries, you’ll see a gray tab icon. Click on that, and you can drag to move them. They’ll automatically snap to multiples of the room size. Try dragging the right SceneBoundary over, so the scene is two rooms in width.
Now, we’ll want to make a second scene so we can put these first two together. Make a new scene. Now, under the Rex Level Editor window, hit the “Setup Level Scene” button.
If you recall, this will give you all the basic building blocks of a scene; if you hit Play to test the scene, you’ll see that you can even test it directly in the Editor, with the Player spawning in at the white starburst spawn point icon. But for now, save this scene as something elegant and descriptive, like “Test_2,” and then open up our first scene again.
Now pop open the Scenes folder in the Project pane, and open up our original scene. Here’s where the magic happens: in the Rex Level Editor window, expand the “Create” field, and click on the button that says “Create Scene Loader (Right).”
This will create a right-aligned SceneLoader, which acts as a doorway between scenes. It’s going to try to snap to the right edge of your scene, which is exactly what we want. Click on it, and look at its Inspector.
Under its SceneLoader component, there are a few things we’ll want to tweak. The first option, Identifier, is a unique string ID used to differentiate this SceneLoader from any other SceneLoaders in the same scene. For simplicity’s sake, it’s easiest to call the first SceneLoader in a scene A, the second one B, and so on and so forth. The second field, Level To Load, is the name of the scene that will be loaded when the player touches this SceneLoader; here, we’ll enter “Test_2,” since that’s the name of the other scene we just made. Finally, there’s a Load Point field; this is the ID of the SceneLoader in the new scene that we want to load into. We can leave this as “A” for now.
There’s one last thing to take care of: as you’ve probably guessed, Test_2 has no SceneLoaders yet. In this scenario, the engine will simply load the player into the white Spawn Point icon, or if that doesn’t exist either, into Vector3.zero. To ensure that we load in at the right place, drag a SceneLoader_left into this scene, which will handily auto-snap to the left side of the room. Give this an Identifier of “A;” since the SceneLoader in the previous room’s Load Point is set to A, it will know to load us into this specific SceneLoader. Then change Level To Load to “Test_1” so that this SceneLoader will load us into the previous room.
Now we can test this in action! From either of the two rooms we’ve created, hit the Play button. Then, if you move onto either of the two SceneLoaders, it will load you directly into the other one.
There’s one last thing we should tweak. You’ll want to be aware of the BoxCollider height of your SceneLoaders; they should cover every open inch of space to prevent scenarios where the player would run into the edge of the screen and accidentally not trigger them. Additionally, it’s very important to make sure they’re exactly the same height and that they don’t extend into the floor; this will prevent SceneLoaders from making the player look choppy as they change scenes, or worse yet, from loading the player into the floor.
LevelManager
You can set the music that plays in a level in the Rex Level Editor window, under Level Settings > Music Track. Additionally, you can set whether or not pause functionality is enabled in the “Is Pause Enabled in Scene” checkbox.
The Pause Screen, Ready Messages, Hit Sparks, Score, and More
Singletons
In the Project pane, expand the following folder and drag the Singletons prefab into the active scene.
- Rex Engine > Resources > System > Singletons
The Singletons GameObject houses a variety of useful things:
Pause Manager
The child PauseManager GameObject, for example, has an Inspector slot called “Pause Overlay” that lets you slot the overlay that appears when the game is paused. In Booster’s Adventure, the overlay is a gray rectangle that covers the screen with “PAUSE” text on top, but you could just as easily make it nothing at all, or even make it a menu! The trick is simply to slot the GameObject you’d like into the Pause Overlay field, and it will automatically activate and de-activate when the game is paused and unpaused.
Hit Spark Manager
HitSparkManager governs the hit sparks that play when an actor takes damage, or when it is hit but no damage is applied. If you expand the HitSparkManager GameObject, you’ll see a DamagedSparkPool and a NotDamagedSparkPool. Each of these allows you to slot a prefab for the spark animation that plays in that circumstance. It’s easiest to give the spark itself the RexParticle component, which will play nicely with RexSpawnPool to spawn and despawn at the right times.
Score Manager
ScoreManager allows you to display the player’s score onscreen. It has a TextMesh child, which you can position and style as you see fit, or hide entirely if you don’t need it.
Dialogue Manager
DialogueManager lets you display dialogue popups like the ones in Booster’s Adventure. In the Inspector, the DialogueManager component lets you slot in a TextMesh, an Advance Icon which displays to let the player know they can advance the text with a button press, and Audio Clips for when the dialogue box appears and is dismissed.
Ready Message
The ReadyMessage appears when the player first starts a level. In the Inspector, you can set the text of the message, and even set up multiple messages which will cycle randomly each time a level starts.
Game Manager
It’s been said a couple times, but it’s worth repeating because it’s so important: the GameManager object has a field called “Player Prefab” where you can slot the prefab for the player. This prefab automatically gets loaded when the game starts. As such, it should be slotted with a fully-featured RexActor that’s ready to accept input, has a RexController, a health bar, and so on and so forth. If you want to create a new player prefab to slow here, the easiest way is via the menu, at:
- GameObject > Create Rex Engine > Create Blank Player
That will give you a fresh GameObject, ready for your customization, with all the features needed to slot into the Player Prefab slot on GameManager.
Where to Go From Here
The Sky’s the Limit
Under the Resources folder, you’ll see a variety of things you can use to flesh out your levels, including enemies, obstacles, and powerups.
Writing Your Own Scripts
In the meantime, you might want to make your own stuff, as well! Fortunately, Rex Engine makes that pretty easy.
If you’re creating a new enemy, you can use:
- GameObject > Create Rex Engine > Create Blank Enemy
On the base level of the resulting GameObject, you’ll see an “Enemy” component; if you want to create an entirely new script for this enemy to use, you can extend Enemy.cs, and put that new script in place of the existing Enemy component on this object. Similarly, you can extend Player.cs to create a new Player script.
Additionally, you can override Powerup.cs to make new powerups. If you’re feeling really overzealous, you can even create your own brand-new movements and mechanics by extending RexState.cs, but be forewarned that we’ll be updating with new versions of these, so it may not be necessary.
Documentation
Documentation for all of the Rex Engine code can be found at https://www.skytyrannosaur.com.